Glass elevation design
Glass Elevation Design: See Glass on Your House Front
A glass elevation uses large glazed areas on the front of a house: a tall glass strip over the stair, a glass front on the upper floor, floor to ceiling windows or a glass balcony railing, usually with slim black or grey frames and sometimes tinted glass. It brings in light and gives a modern look, which is why front elevation glass designs are searched so often. This AI glass elevation design tool starts from a picture: upload a photo of your house front, a sketch or a clay model, and ArchitecturesAI renders it in the same view; then describe where the glass goes and the frame colour. The result is an idea picture. It is not a glazing specification, a heat study or a quote.
Upload your house front photoSign in with Google or email to render. New accounts get 1 free render (watermarked).
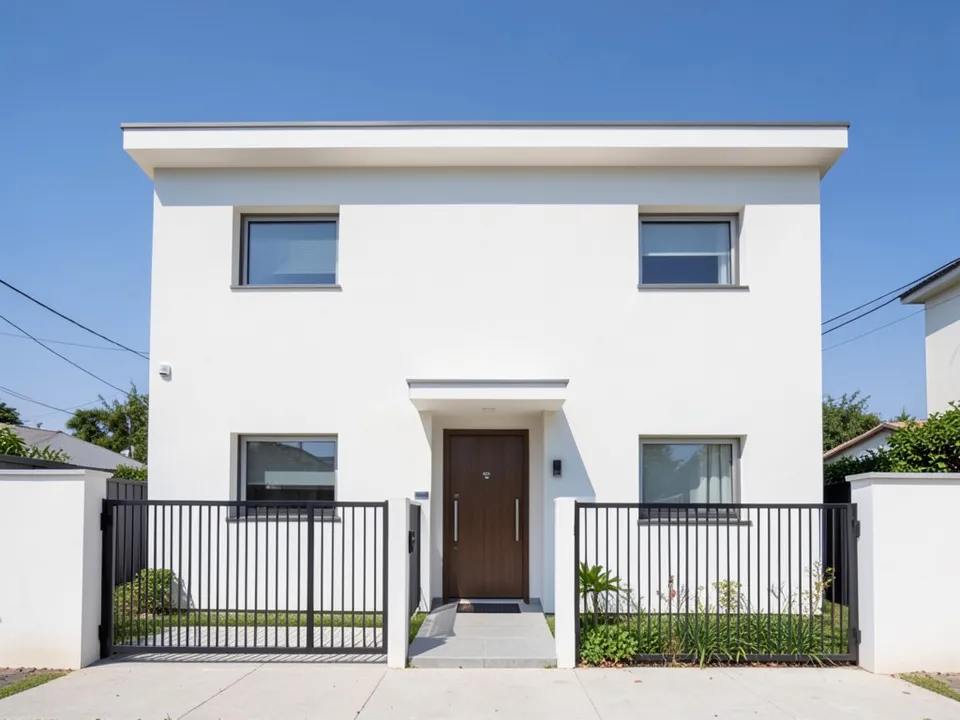
Before: white house with small windows (AI-drawn stand-in for a photo)
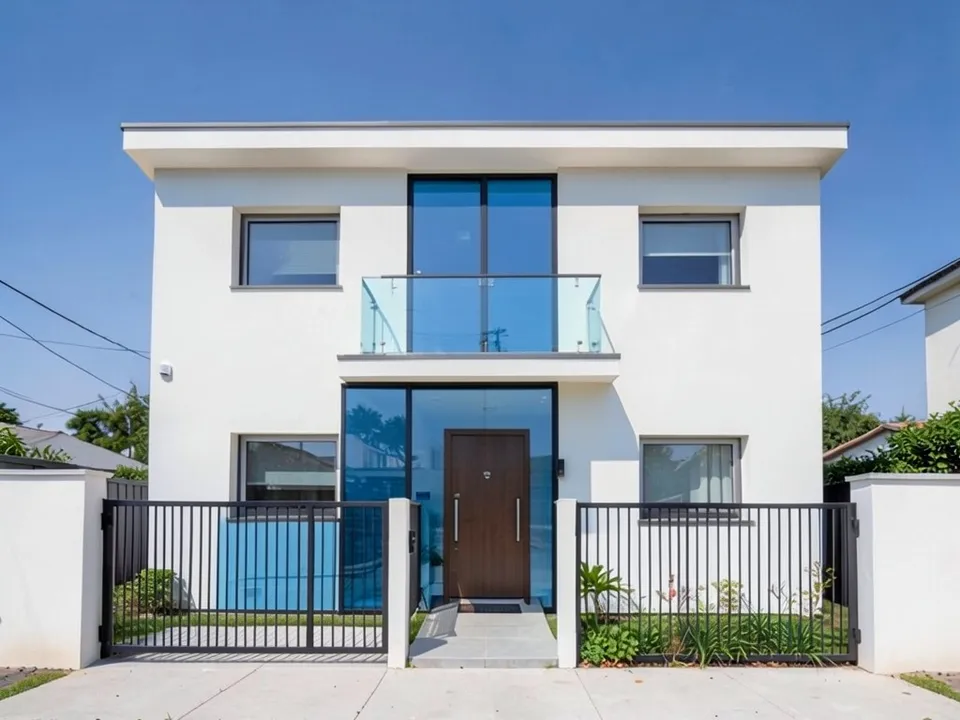
After: a blue tinted glass strip
Common glass elevation designs
HomeLane's elevation glass designs, Housing.com's glass elevation ideas and Brick and Bolt's front elevation guides show the same options:
- A tall vertical glass strip over the staircase.
- A glass front or large windows across the upper floor.
- Glass balcony railings in place of metal grills.
- Slim black, grey or wood look frames, and blue, grey or clear glass.
- Glass paired with ACP, stone or louvers to control heat and privacy.
How to try a glass elevation design with ArchitecturesAI
- In the editor above, the mode is Render Architecture, the type is Residential and the style is Modern. This mode has no prompt box: you start from an image.
- Under Select Image, upload a JPG or PNG: a daylight photo of the front of your house taken from the street, or a sketch, a clay model or a screenshot from your 3D software.
- Click Generate. Free accounts can only use Low quality (Medium and High are marked PRO). Sign in with Google or email when asked.
- To steer the result, click Edit Image on it (the box is called Edit Instructions) or use Custom Action, and describe where the glass goes, the glass tint and the frame colour and what must stay the same. Each edit is another render and uses credits. Run it a few times, since every result differs.
- The three examples below ran directly on our image model with the written instructions shown. They did not go through the editor above, so your own results will differ.
Glass on an existing house
A photo of the front is enough to try glass. In both tests the model kept the door and the gate, but placed less glass than asked, so say exactly how wide and how tall it should be.
Before: white house with small windows (AI-drawn stand-in for a photo)
After: a blue tinted glass strip
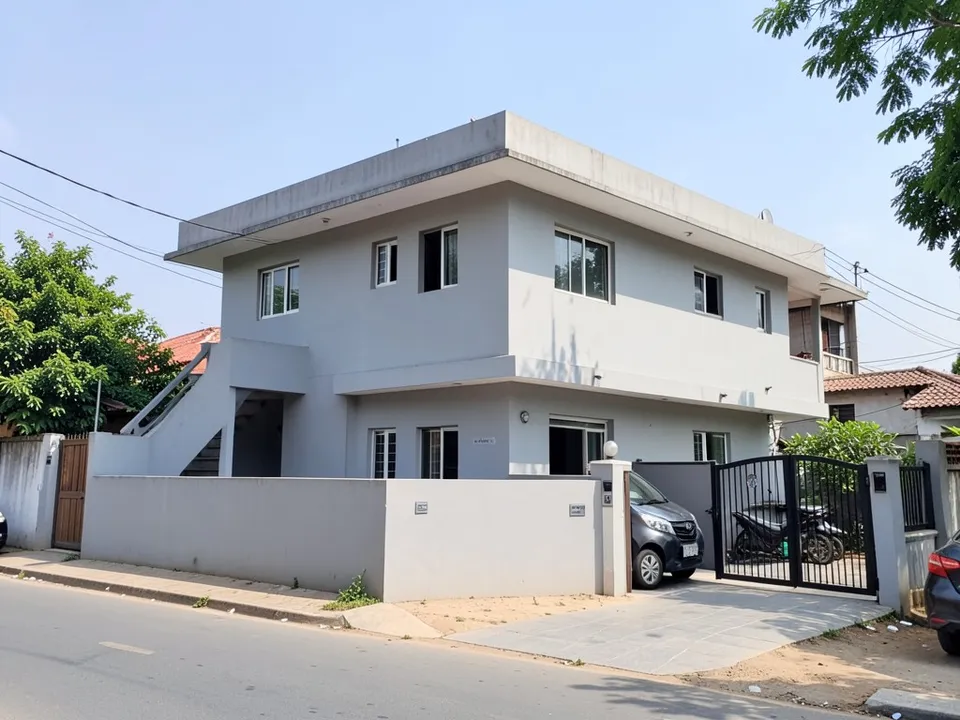
Before: grey house with outside stairs (AI-drawn stand-in for a photo)
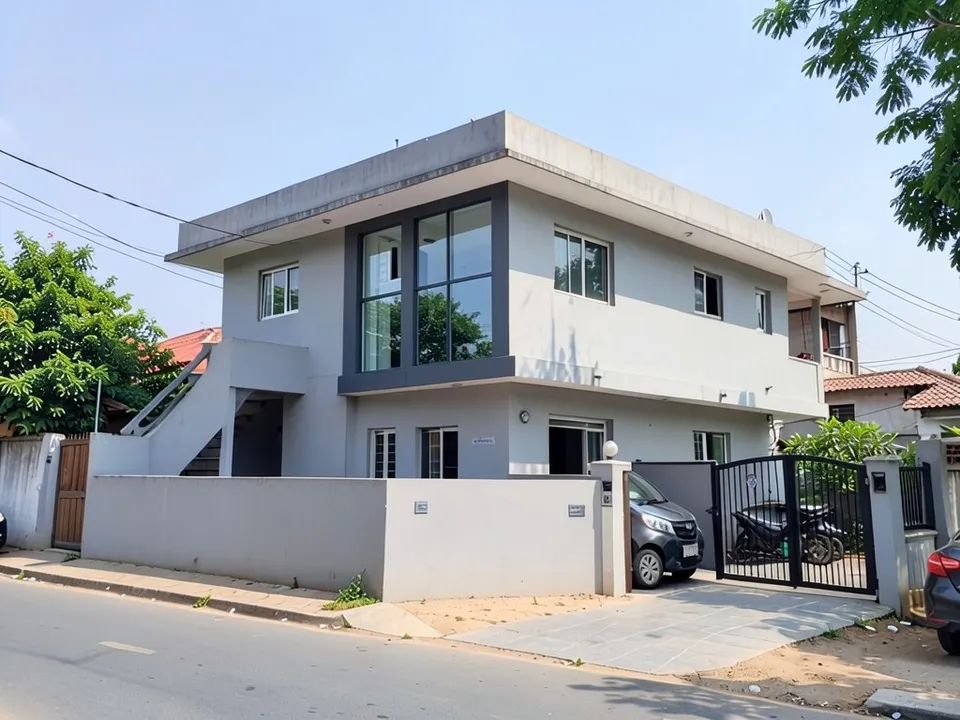
After: a tall glass window in a grey frame
A glass front from a sketch
A sketch keeps the glass where you drew it and lets you try frame colours and wall finishes around it.
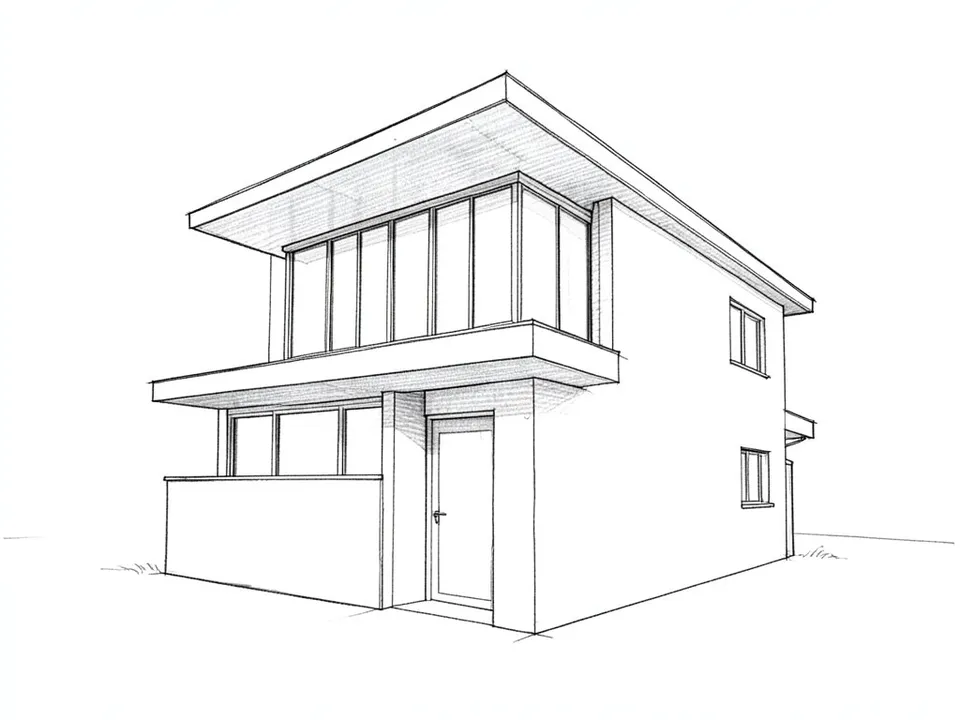
Before: line sketch with a glass front (AI-drawn stand-in for a hand sketch)
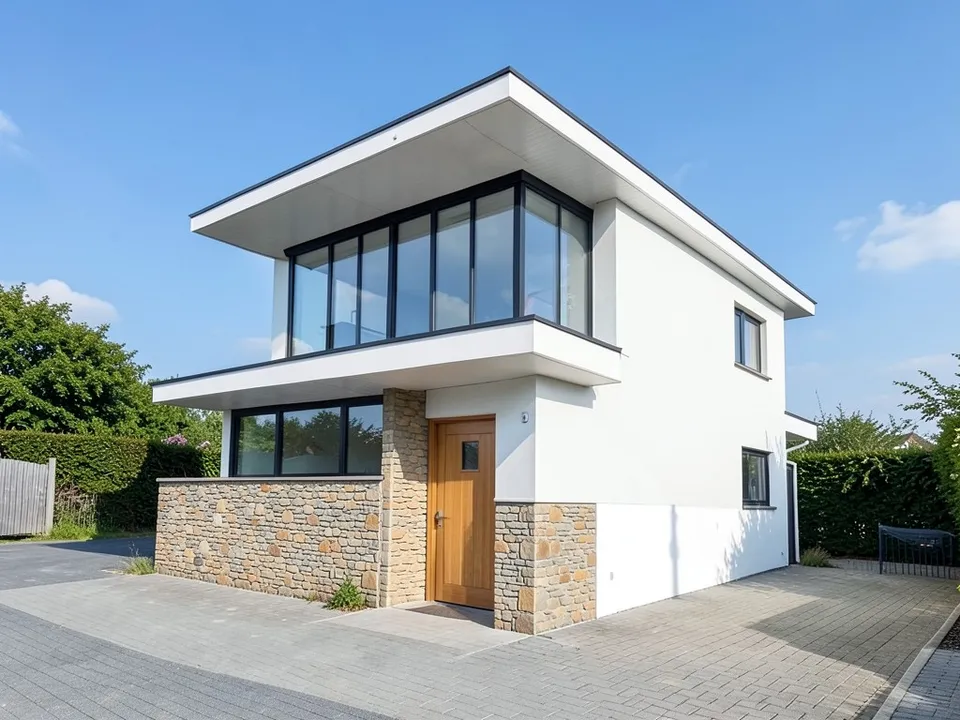
After: sketch turned into a glass front
What the AI keeps and what it may change
- Usually kept: the camera angle, the house shape, the door and the gate.
- Often different from what you asked: how wide or tall the glass is, and whether it runs into the ground floor.
- Not shown: heat gain, privacy at night or glass thickness.
- Never produced: floor plans, structure, cost estimates or approval drawings.
Looking at other front finishes?
The louvers page covers fins in front of glass, the ACP elevation page covers panel cladding, and the balcony and staircase pages cover railings and stairs.
Free tier and plans
You need a free account to render. New accounts get 1 free render, and free renders carry a watermark. Weekly, monthly and yearly plans for more renders without the watermark are on the pricing page.
The houses and the sketch on this page are AI-drawn stand-ins, not real. Each example was run directly on the model, not through the tool above.
Frequently asked questions
Can it put a glass front on my house?
Yes. Upload a photo of the front and describe where the glass goes and the frame colour. Say how wide and tall, since the model often places less glass than asked.
Can I try tinted glass?
Yes. Name the tint, such as blue, grey or clear. Our test used blue tinted glass.
Is there a text box in the editor?
The prompt box exists only in Architecture Generator mode. The editor above opens in Render Architecture, where you upload an image and change the result with Edit Image (Edit Instructions) or Custom Action.
Does it tell me how hot the house will get?
No. It makes a picture. Heat and glass type are for your architect.
Is it free to try?
Yes. After you sign in, a new account gets 1 free render with a watermark, in Low quality. Paid weekly, monthly and yearly plans are listed on the pricing page.
See glass on your house front
Upload a photo of your house front or your sketch, compare a few glass layouts, and take the best one to your architect. Your first render on a free account is on us.
Upload your house front photoRelated: Front elevation design · House facade design · Balcony design · Staircase design · Modern house design · House elevation 3D render · Render Architecture tool · Pricing · AI house design generator · AI house exterior renovation · AI ACP elevation design