AI render enhancer
AI Render Enhancer: Make Your Architectural Renders Photoreal
Export a render or a viewport image from Lumion, Enscape, Twinmotion, V-Ray, D5 or SketchUp as a JPG or PNG, upload it, and ArchitecturesAI paints over it with more convincing materials, daylight, shadows, sky, planting and people. The walls, openings, camera and layout in your image are what the AI builds on. There is no scene to re-light, no material library to fix and no GPU to wait on. You get a new image back, not an updated model, and the AI can change small things, so check it before it goes to a client.
Enhance your renderSign in with Google or email to render. New accounts get 2 free renders (watermarked); free renders are not available in India on this site.
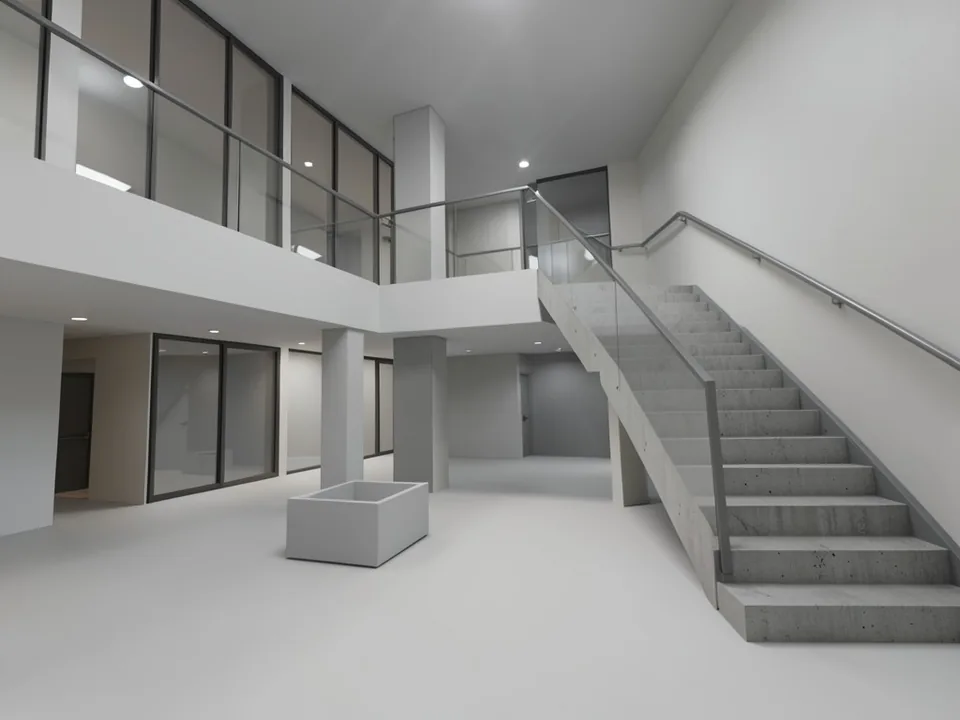
Before: flat real-time style render
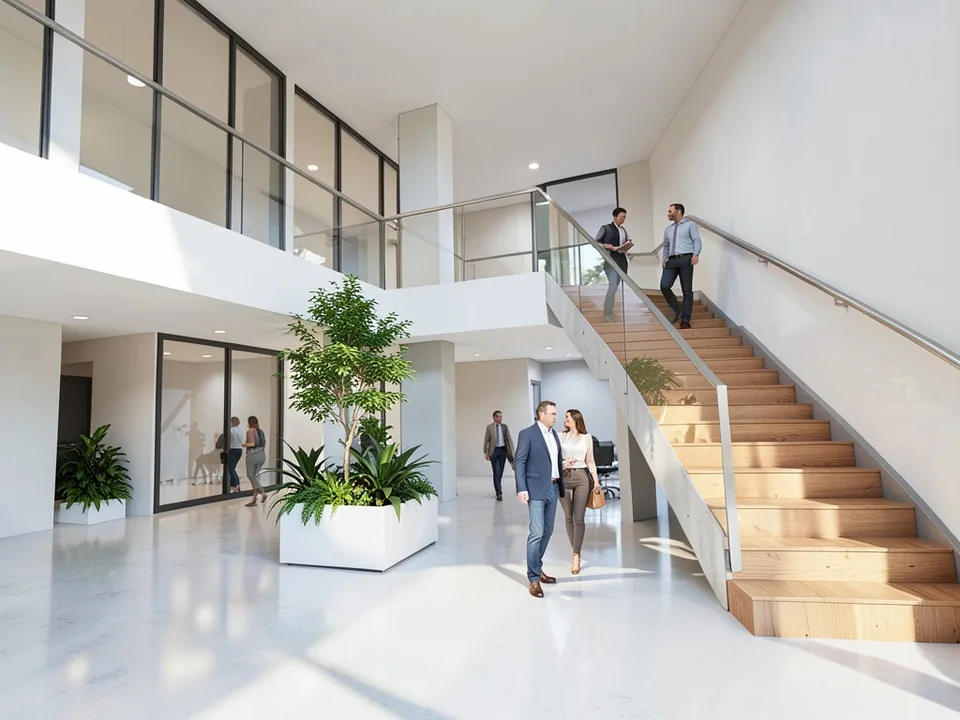
After: enhanced: light, materials, people
Why architectural renders look flat
Most renders that look "CG" share the same problems: even, shadowless light; materials that are a single flat colour or a tiled texture; glass with no reflection; a plain sky; an empty site with no planting; and no people to give the space scale. Real-time engines such as Lumion, Enscape, Twinmotion and D5 can fix all of that, but it takes time on lighting, material maps, asset placement and settings, plus a graphics card that can handle it. A V-Ray or Corona scene can get there too, with longer render times.
Early in a project, most of that effort goes into images that will be replaced next week. An AI render enhancer is a shortcut for those stages: you keep the geometry and the camera you already have and let the AI add the light, texture, landscape and life that make a picture read as a photograph.
How to enhance a render with ArchitecturesAI
- Export the view you want as a JPG or PNG: a Lumion, Enscape, Twinmotion or D5 screenshot or still, a V-Ray or Corona frame, or a SketchUp scene exported with File > Export > 2D Graphic. About 1,600 pixels wide or more keeps thin details such as railings and mullions.
- Click "Enhance your render". The Render Architecture tool opens with Residential and Modern selected. Sign in with Google or email.
- Upload your render and pick the building type that fits: Interior or Office for an interior view, Exterior, Residential or Villa for a house, Commercial or Facade for a street front, 3D Model for a plain model view (25 types in total).
- Pick the style that matches the design you already have, such as Modern, Contemporary, Minimalist, Scandinavian, Mediterranean or Traditional (25 styles in total). The tool asks the AI to render your building in that style, so a style far from your design pulls the result away from it.
- Press Generate and download the result.
- To steer one thing, such as people, planting, time of day or a material, open Custom Action or Edit Image on the result and describe the change in a sentence. Those actions work on the rendered result, not on your original upload. You can paste the prompts printed under each example there, but the examples on this page ran directly on an image model, not through this tool, and the tool runs different models, so your result will differ. Each change runs a new render and uses credits.
Enhance or upscale: which one you need
These are two different jobs. Enhancing, in the sense of this page, repaints the image: it adds light, shadows, reflections, material texture, trees and people that were not in your render. Upscaling keeps the picture as it is and makes it larger and sharper, cleaning up noise and soft edges without adding anything new.
ArchitecturesAI has a separate Enhancement tool, and it is an upscaler. It takes an image with no prompt and enlarges it, with Noise Reduction, Detail Enhancement and Standard options. Free accounts get 2x; 3x and 4x are for paid accounts. It will make a flat render bigger and crisper, but it will not make it look photographic. To go from flat to photoreal, use the Render Architecture tool above; if you also need a larger file at the end, you can run the result through the Enhancement tool afterwards.
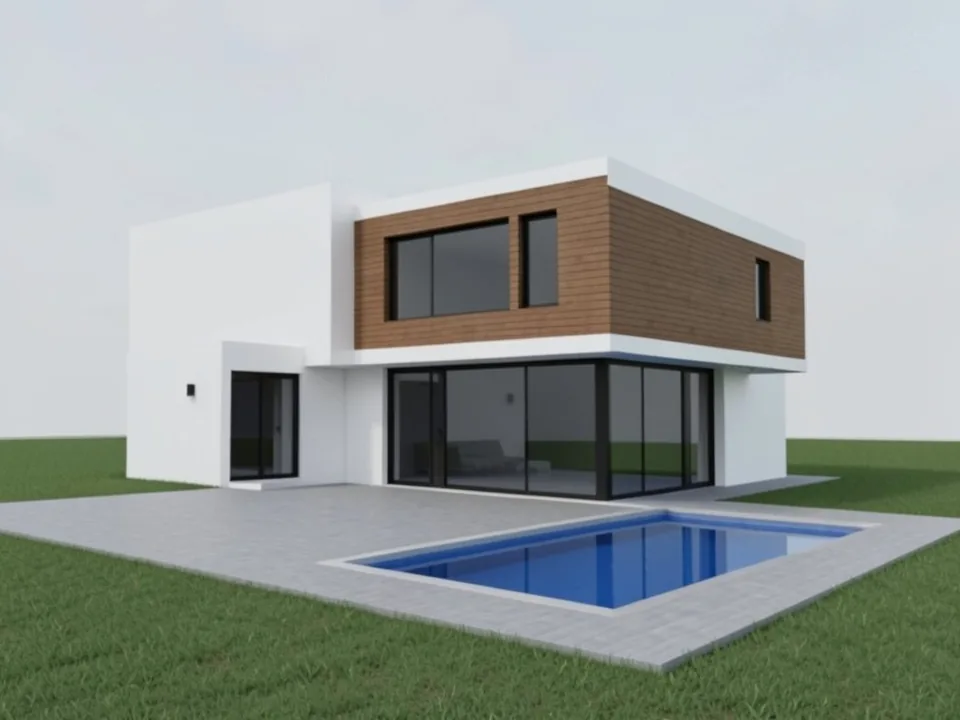
Before: flat, low-res villa render
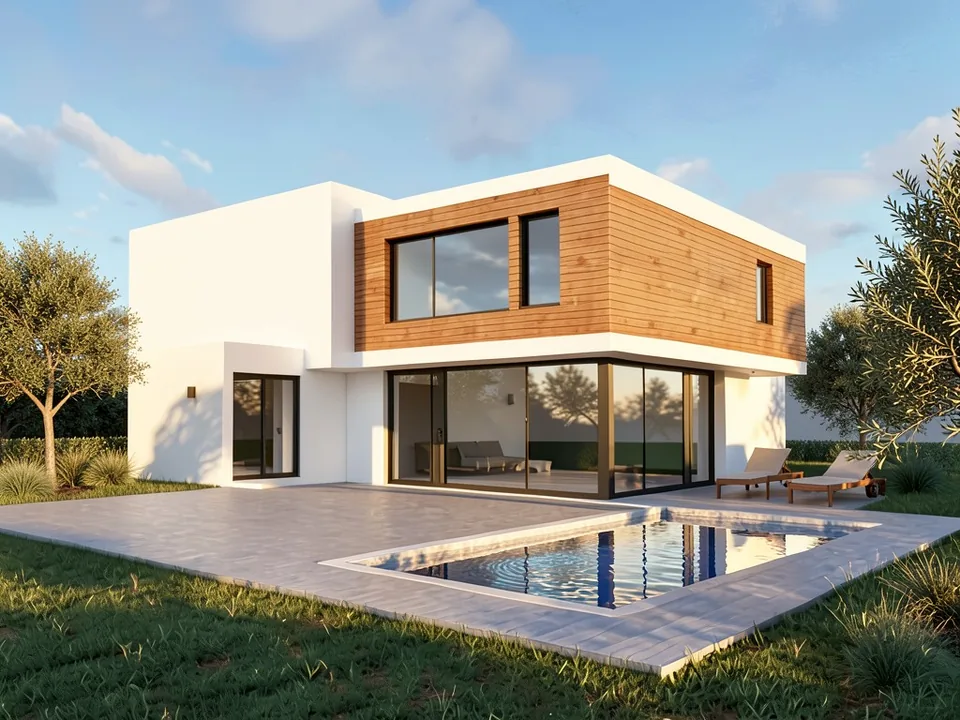
After: enhanced: sun, timber, pool, planting
Get more out of your render before you upload
The AI only sees the picture, so the input decides most of the output:
- Turn off overlays. Hide grids, section planes, dimensions, axes, selection outlines, watermarks and UI panels before exporting.
- Keep verticals straight. Two-point perspective reads like architectural photography; a tilted camera makes walls lean, and the enhanced image keeps the lean.
- Give materials distinct colours. Even rough colours for glass, timber, render, stone and roof help the AI tell surfaces apart; an all-white clay model leaves more to guesswork.
- Model what matters. If a mullion pattern, a balustrade or a roof edge is part of the design, it should be in the render. The AI fills empty areas with its own ideas.
- Show the ground and the sky. A terrace, lawn or street tells the AI where the building sits; a model floating on a blank background gets an invented setting.
- Ask for people and plants in words. Use Custom Action to say how many people, where, and what kind of planting, rather than placing low-quality assets in the scene.
- Export large and leave a margin. Small images lose fine detail, and anything cut off by the frame stays cut off.
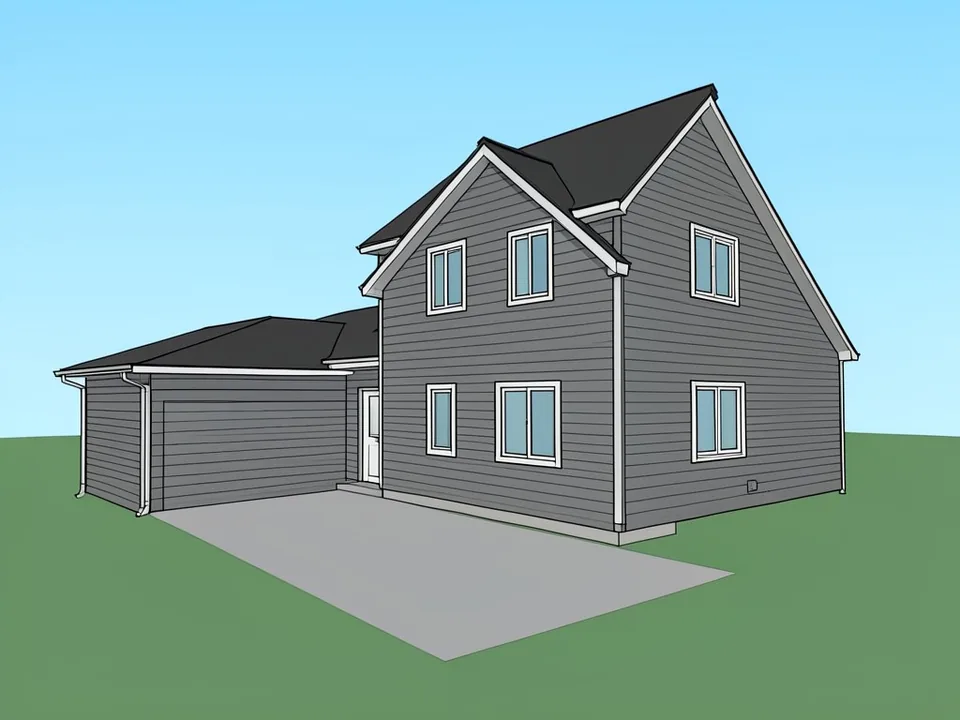
Before: SketchUp-style shaded export
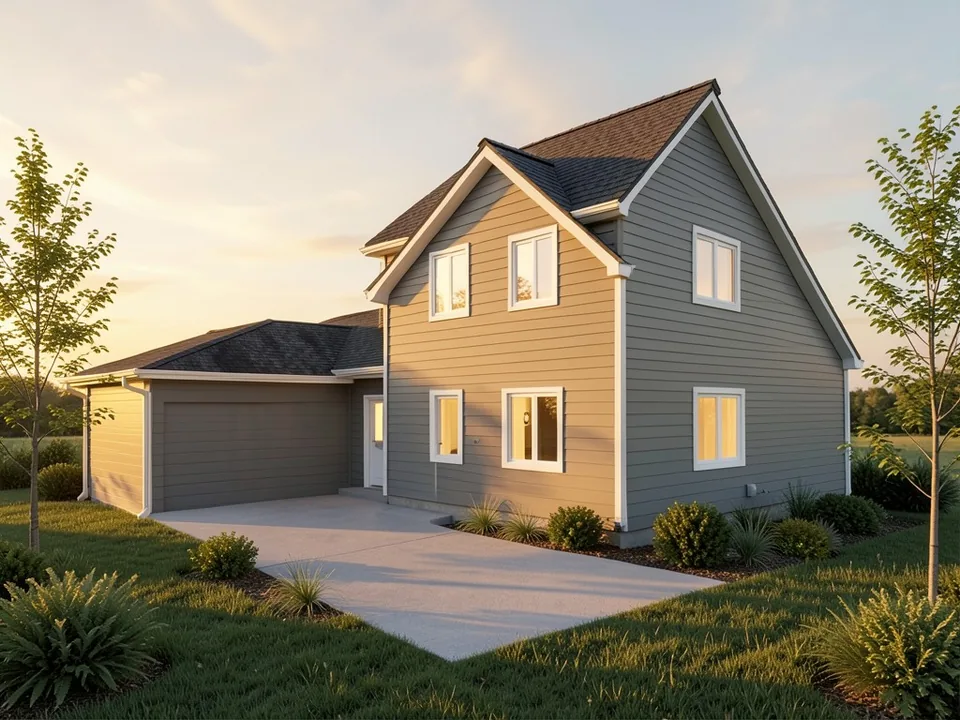
After: enhanced: golden hour
What the AI changes, and what to check
The AI keeps the camera, the massing and most openings, but it is not reading your model. As the captions above show, it adds things you did not ask for: extra planters, furniture, garden walls, a garage door, fields in the background. It can also miss part of an instruction, such as lighting every window when you asked for one or two. Two runs of the same image will not match exactly.
So treat the result as a design image, not a construction document. Compare window counts, mullion patterns, rail heights and roof edges with your drawings before the image goes out, and run it again or edit it if something has drifted. When the design is fixed and you need exact materials, repeatable views, animation or a walkthrough, finish the job in your renderer.
Who uses an AI render enhancer
- Architects who need a convincing image for a client meeting or competition board before the scene is fully lit and textured.
- Students who work in SketchUp or a real-time engine on a laptop and want a photographic image for a review.
- Visualisers who want a quick mood or lighting study from a draft render before committing to a long final render.
- Developers and agents who have a plain model view and want a marketing-style image of the same building.
Free tier and plans
You need a free account to render. New accounts get 2 free renders, and free renders carry a watermark. In India this site does not include free renders, so a paid plan is needed there. Weekly, monthly and yearly plans for more renders without the watermark are on the pricing page.
ArchitecturesAI is an independent web tool and is not affiliated with or endorsed by the makers of Lumion, Enscape, Twinmotion, V-Ray, D5 Render or SketchUp. Those names are trademarks of their owners, used here only to describe the images people export from them.
Frequently asked questions
What is an AI render enhancer?
It is a tool that takes a finished or draft architectural render and repaints it to look more like a photograph: more realistic materials, light and shadows, reflections, sky, planting and people. On ArchitecturesAI you upload the render to the Render Architecture tool, pick a building type and a style, and download the result.
Will it change my design?
It builds on your design, but it does not copy it exactly. The camera, massing, openings and layout usually stay, as the three examples show. The AI can add or redraw small things, such as furniture, planters, a garage door or background trees, and the style you pick can pull details toward that style. Check the result against your drawings and run it again if a part drifts.
Which rendering software does it work with?
Any that can save an image. Lumion, Enscape, Twinmotion, D5, V-Ray, Corona and SketchUp exports all work, as do screenshots of a viewport. The tool only sees the JPG or PNG you upload, so the software and version make no difference, and nothing is installed or linked to your model.
Can it add people and vegetation?
Yes. The examples on this page added office workers, a tree in a planter, olive trees, grasses, shrubs and lawns. In the tool, run Generate first, then use Custom Action or Edit Image on the result and say what you want, for example "add a few people walking and two olive trees by the terrace". The AI decides their exact look and placement.
What is the difference between enhancing and upscaling?
Enhancing repaints the image with new light, texture, planting and people. Upscaling only makes the existing image larger and sharper. The site's Enhancement tool is an upscaler (2x on free accounts, 3x and 4x on paid ones); the Render Architecture tool is the one that makes a render look photographic.
Does it give me a higher resolution file?
Not by itself. The Render Architecture tool returns a new image; if you need it larger, run that result through the Enhancement tool, which upscales it. Starting from a large, clean export also helps.
How is this different from sketch to render?
Sketch to render starts from a hand sketch, line drawing or massing model and invents most of the materials and setting. A render enhancer starts from an image that already has your materials, camera and lighting roughly set, and makes it look more real. If you only have a sketch, use the sketch to render AI page instead.
Is it free to try?
Yes. After you sign in, a new account gets 2 free renders with a watermark. In India this site does not include free renders. Paid weekly, monthly and yearly plans are listed on the pricing page.
Enhance your next render
Export a render or viewport image, upload it, pick a building type and a style, and download a more photographic image for your client. Your first 2 renders on a free account are on us.
Enhance your renderRelated: Sketch to render AI · Floor plan to 3D render · Render Architecture tool · Enhancement (upscaler) tool · Pricing