Live Home 3D render
Live Home 3D Render, Made Photoreal with AI
Live Home 3D makes it easy to lay out rooms and a whole house, but a plain 3D view still looks like a model, and a good Cycles render takes tuning. Export the 3D view as a picture, or take a screenshot, and upload it. ArchitecturesAI repaints it as a photo-like image with daylight, real-looking materials and planting. It usually keeps your camera and layout but redraws finishes, colours and small items, so check the result against your plan.
Render your Live Home 3D viewSign in with Google or email to render. New accounts get 2 free renders (watermarked); free renders are not available in India on this site.
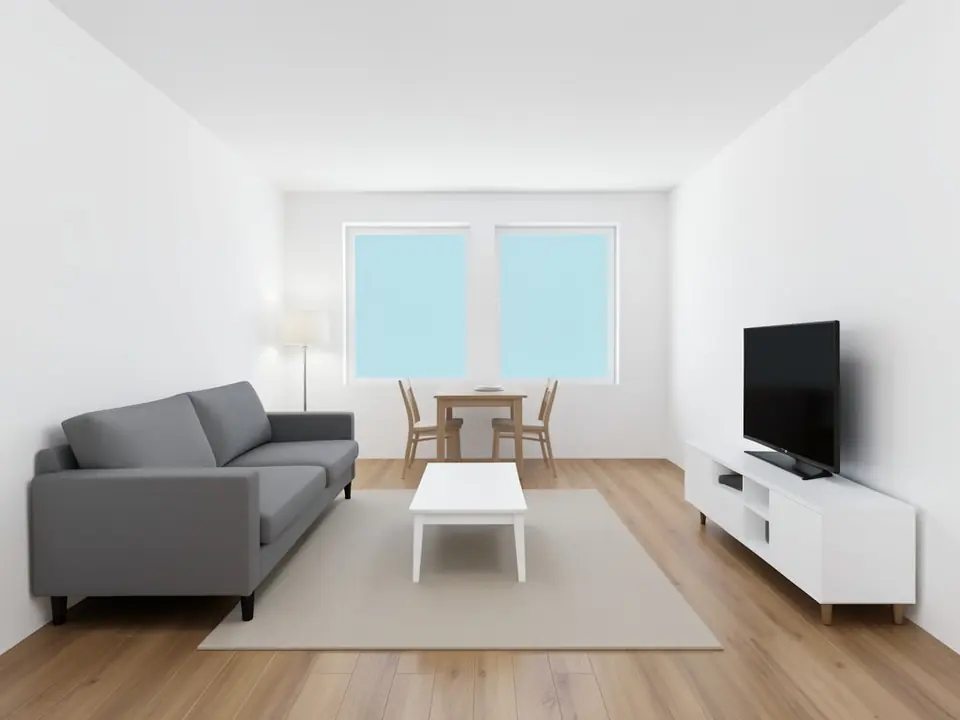
Before: Live Home 3D style 3D view (AI-drawn stand-in)
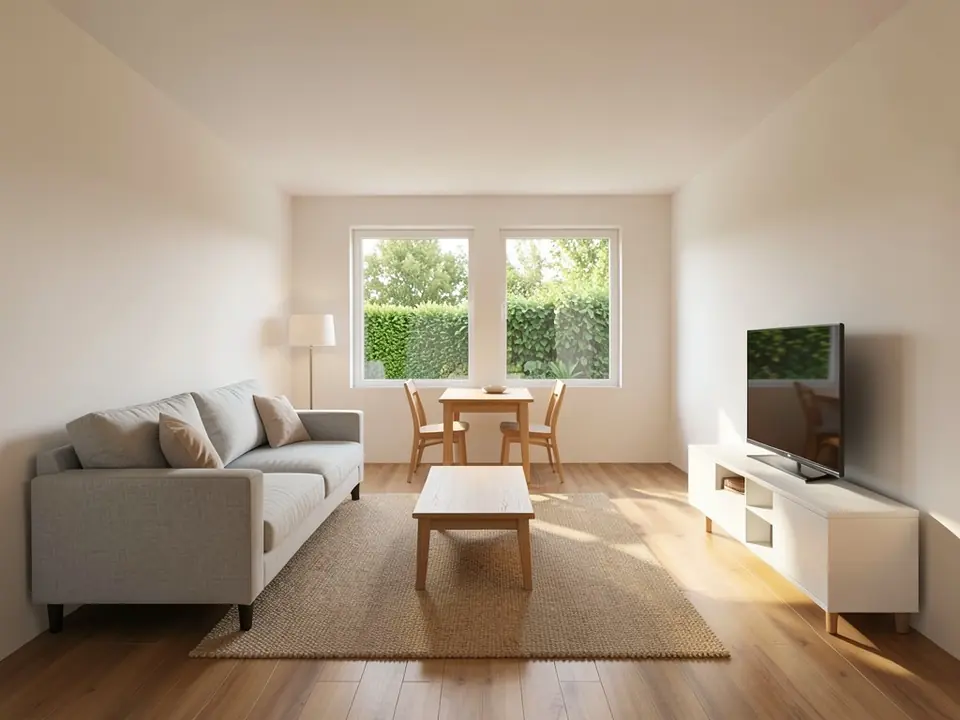
After: rendered: daylight, linen, oak
How rendering works in Live Home 3D
Live Home 3D is a home design app from BeLight Software for Mac, Windows, iPhone and iPad, among other devices. You draw the plan and the app shows a live 3D view of it. That view is quick to use but plain, which is why people search for a better render.
Inside the app, BeLight offers two render engines: Cycles, on Mac and Windows, and AMD Radeon ProRender, on Mac only. Its Cycles guide notes that Cycles can use the graphics card on Mac, while Windows renders on the processor. The same guide says the full set of render settings needs the Pro features unlocked; without them you can still render, at lower resolutions. On its rendering software page, BeLight says the built-in renderer gives free, unlimited renderings.
Getting a Cycles image to look real is mostly about light and materials: samples and noise, environment light for rooms lit by windows, extra lamps, and physically based materials. The tips in BeLight’s own guide make that point, warning that a render with plain materials may look much like a screenshot.
AI rendering skips that setup. You keep the view you set up, and the AI repaints it in one pass. It does not read your lamps, sun position, materials or furniture models, and it makes its own choices about finishes, as the examples on this page show.
How to render a Live Home 3D view with ArchitecturesAI
- In Live Home 3D, set up the view you want (see the tips below). On a Mac, choose File > Export > Export to File…, set Export to 3D View, pick the current view or a saved camera, set the image size, choose PNG or JPEG and save. On Windows, open the main menu, choose Export and then Export 3D View…, set Export to 3D View, set the size and save. On iPhone or iPad, tap the Menu button, choose Export and then Share, select 3D View in the Export popover, set the size and tap Share. A Cycles or ProRender image, or a screenshot of the 3D view, also works.
- Click "Render your Live Home 3D view". The Render Architecture tool opens with Interior selected under Architecture Type and Modern under Style. Sign in with Google or email.
- Under "Please select an image", click Select Image and upload your PNG or JPEG.
- Keep Interior for a room. For the outside of the house, like the second example, choose Residential or Exterior under Architecture Type. Then pick the Style closest to your design, such as Modern, Scandinavian or Minimalist (25 in total).
- Free accounts can only use Low quality (Medium and High are marked PRO). Press Generate Architecture and download the result.
- To change one thing, such as the cabinet colour or the floor, open Custom Action or Edit Image on the result and describe it in a sentence; each one uses credits. The examples on this page ran directly on our image model, not through this tool, so your result will differ.
Export tips: getting a good view out of Live Home 3D
The AI only sees your picture and usually keeps your camera, so most of the work is choosing the view before you export it.
- Point of view. Move the camera with the Walk Control tools to standing height for a room, or step back into the yard for the house. On a Mac, the field of view is set in the Inspector; a moderate angle looks more like a real photo, and the AI usually keeps the framing you give it.
- Save the camera. If you save the view as a camera, you can export exactly the same angle again after you change the design and compare renders side by side.
- Image only. Use the Export dialog rather than a screenshot of the whole app window when you can. If you do take a screenshot, crop away toolbars, the plan and any panels, because the AI tries to turn whatever is in the picture into part of the room.
- Image size. Pick a landscape size large enough that small objects stay readable. You do not need a long Cycles render first, because the AI redraws the light anyway.
- Plain is fine. Default materials and flat colours are a fine starting point; the stand-ins on this page are flat-shaded too. Expect the AI to change colours and finishes, so treat the ones in your model as a starting point rather than a fixed spec.
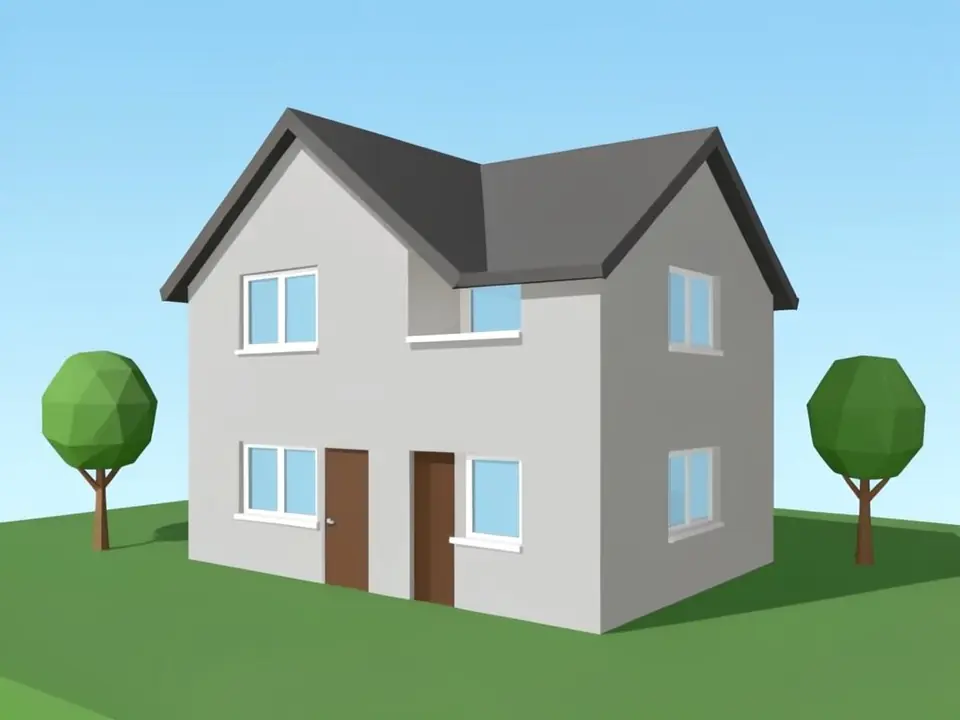
Before: Live Home 3D style exterior (AI-drawn stand-in)
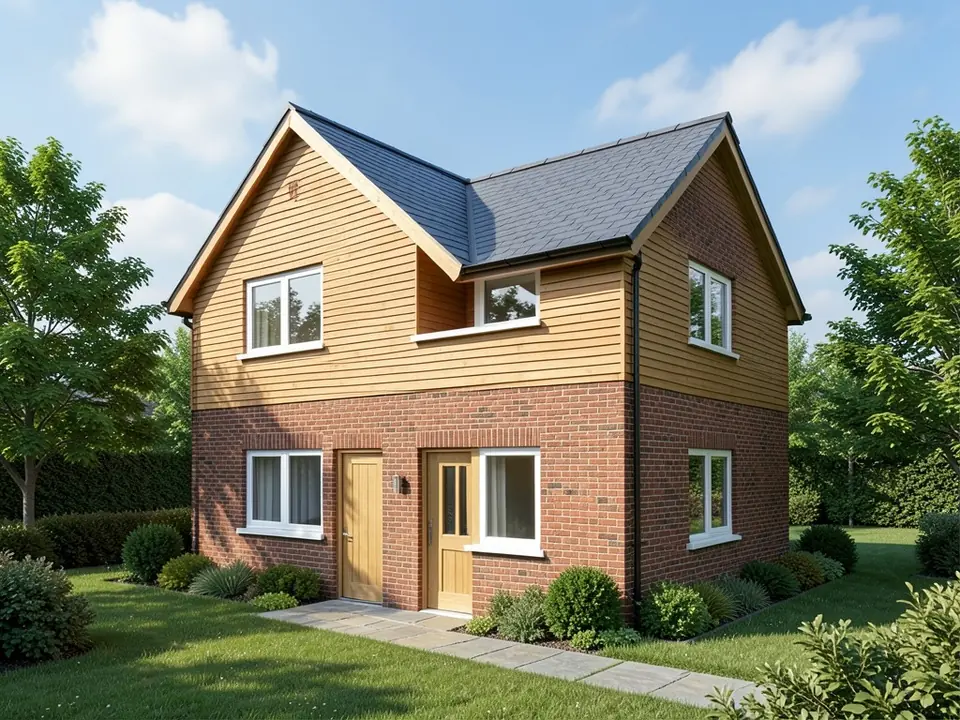
After: rendered: brick, timber, garden
What the AI keeps and what it may change
Use this as a checklist when you compare a result with your plan.
- Usually kept: the camera angle, room shape, window and door positions, the positions and rough sizes of large pieces such as sofas, cabinet runs and islands, and outside, the roof shape and the outline of the house. The camera can still move a little, as in the kitchen example.
- Often redrawn: wall colour, flooring, cabinet fronts, counters, fabrics, rugs, the view through windows, and the light itself, which may not match where your windows are.
- Sometimes invented: cushions, backsplashes, under-cabinet lights, gutters and downpipes, wall lights, curtains, extra trees and hedges, and even a neighbouring roof.
- Never produced: a measured or lighting-accurate render. The AI ignores your lamps, sun settings and materials, and the render tool has no time-of-day setting. Check sizes, clearances and light in Live Home 3D itself.
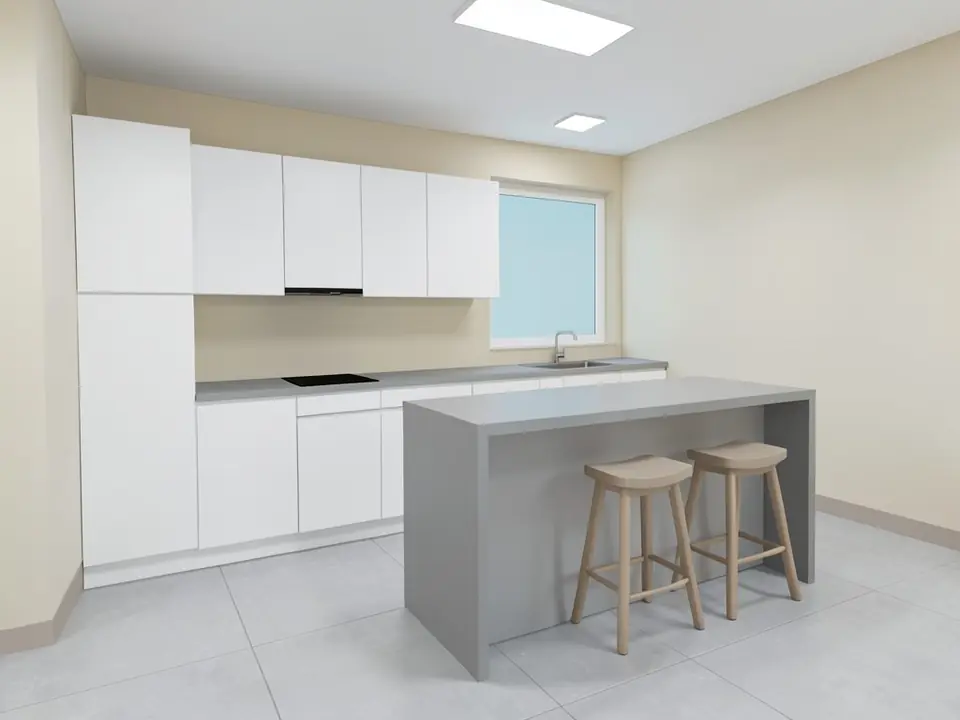
Before: Live Home 3D style kitchen view (AI-drawn stand-in)
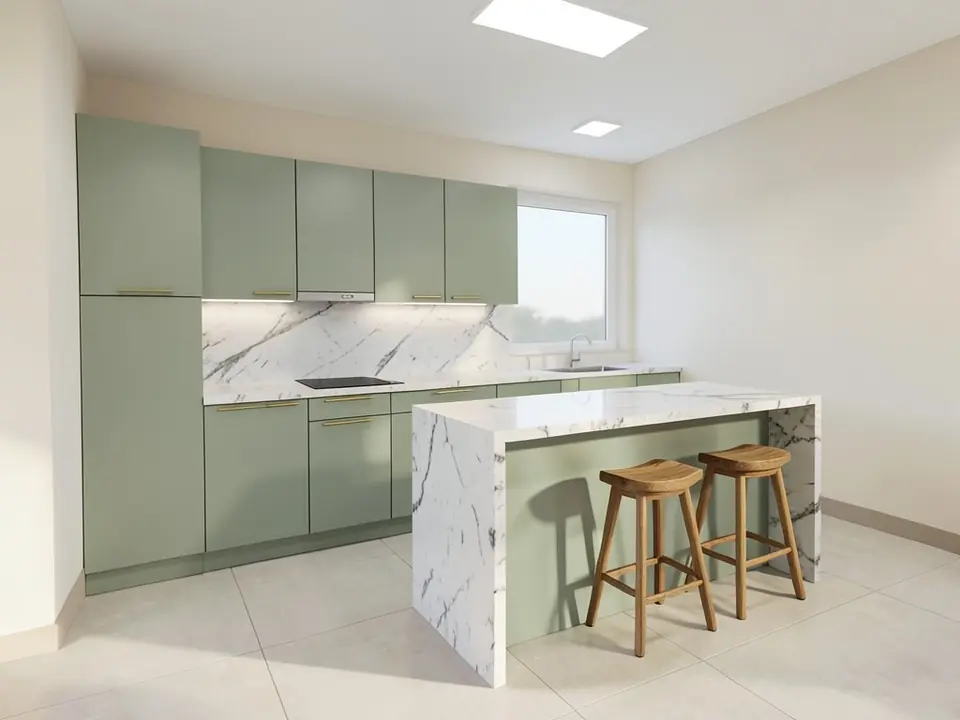
After: rendered: painted cabinets, stone
Cycles, ProRender, other renderers, or AI?
- Cycles or ProRender inside Live Home 3D. Faithful to every object, material and light you placed, and BeLight says its built-in Cycles renderer gives free, unlimited renderings. Expect to tune light and settings, and the higher resolutions need the Pro features.
- Other render software. BeLight’s rendering software article lists V-Ray, LumenRT, SketchFab, Twinmotion, RenderNow and Maxwell among rendering tools and services. Each is a separate product with its own setup to learn.
- AI render on ArchitecturesAI. No setup: upload a picture and get a photo-like image. It is not faithful to your exact furniture or finishes and is not a lighting study. Use it for mood images, early client ideas and quick comparisons of finishes.
Who uses it
- Homeowners planning a renovation, extension or move who want to see how their Live Home 3D rooms could feel.
- Interior design and architecture students who need a presentable image of a layout for class or a portfolio.
- Small builders, kitchen fitters and decorators who plan in Live Home 3D and want a quick picture for a client.
Free tier and plans
You need a free account to render. New accounts get 2 free renders, and free renders carry a watermark. In India this site does not include free renders, so a paid plan is needed there. Weekly, monthly and yearly plans for more renders without the watermark are on the pricing page.
ArchitecturesAI is an independent web tool and is not affiliated with or endorsed by BeLight Software. Live Home 3D is a trademark of its owner, used here only to describe the images people export from it. The "before" images on this page are AI-drawn stand-ins, not Live Home 3D screenshots.
Frequently asked questions
How do I make Live Home 3D renders look more realistic?
Inside the app, render with Cycles and work on light and materials. The tips in BeLight’s Cycles guide suggest adding light sources that are out of shot, setting the time of day to morning for longer shadows, and using physically based materials. For a quick photo-like image without that setup, export the 3D view and upload it here.
What render engines does Live Home 3D have?
BeLight’s Cycles guide names two built-in engines: Cycles on Mac and Windows, and AMD Radeon ProRender on Mac only. The same guide says Cycles can use the graphics card on Mac, while on Windows it renders on the processor.
Do I need Live Home 3D Pro to render?
BeLight’s Cycles guide says the full set of features it describes needs the Pro features unlocked, and that without them you can still render images at lower resolutions. ArchitecturesAI only needs an exported image or a screenshot, whichever version you use.
Can I use other render software?
BeLight’s rendering software article lists V-Ray, LumenRT, SketchFab, Twinmotion, RenderNow and Maxwell among rendering tools and services; it does not describe sending a Live Home 3D project to them. ArchitecturesAI is a different kind of tool: it repaints a picture of your view rather than rendering your model.
What should I upload?
A PNG or JPEG of the 3D view, saved with the Export dialog (on a Mac, File > Export > Export to File… with 3D View selected) or a cropped screenshot with no toolbars or panels. A Cycles render also works. For a room, use a standing-height view with the main furniture fully in frame.
Will the AI keep my furniture and layout?
It usually keeps the camera, room shape, windows, doors and where large furniture stands, at roughly the same size. It often changes colours and finishes, and can add details such as cushions, a backsplash, gutters or extra trees. Compare the result with your plan.
Is this a Live Home 3D plugin?
No. ArchitecturesAI is a web tool. You upload a JPG or PNG in the browser and download the result. Nothing is installed in Live Home 3D and nothing reads your project file.
Is it free to try?
Yes. After you sign in, a new account gets 2 free renders with a watermark. In India this site does not include free renders. Paid weekly, monthly and yearly plans are listed on the pricing page.
Turn your next Live Home 3D view into a photo-like render
Export your Live Home 3D view or take a clean screenshot, upload it, choose Interior (or Residential for the house) and a style, and download the result. Your first 2 renders on a free account are on us.
Render your Live Home 3D viewRelated: Sweet Home 3D render · Floor plan to 3D render · AI render enhancer · AI architectural rendering · Render Architecture tool · Pricing