ArchitecturesAI · Guide · Updated November 6, 2026
How to visualize a home renovation before you start, in 8 steps
Most renovation regrets come from choices made too early. A cabinet colour looks fine on a sample card, then feels wrong on a whole wall. A layout looks open on paper, then feels cramped. Once the work has started, changing your mind costs money.
This guide is about planning, not style ideas. You will turn a photo of your own space into a few concept previews, compare them side by side, put rough numbers next to each one, and print a page to take to your builder. The previews are pictures, not plans or quotes, and the guide says where that matters.
In short
- Write the goal and a budget cap
- Photograph the space as it is today
- Decide what stays and what changes
- Upload the photo and preview it in Remodel mode
- Try two or three options on the same photo
- Compare the options with your own photo
- Check each result for things that cannot be built
- Put rough numbers in the cost list, then print a brief
The starting photo
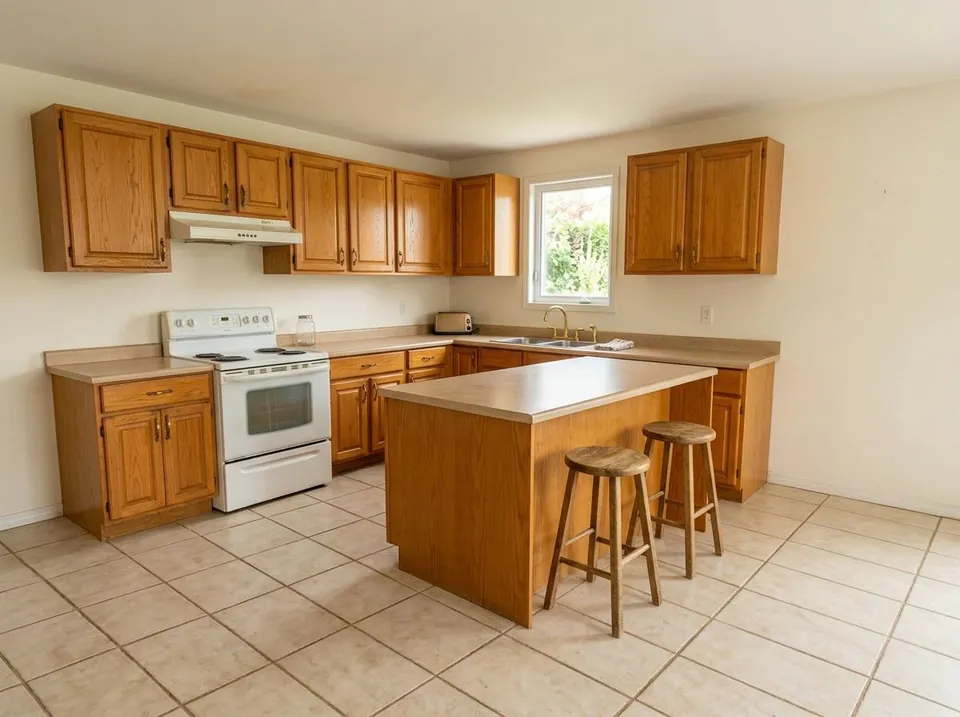
How to visualize a renovation, step by step
1. Write the goal and a budget cap
Before any picture, write two lines: what the renovation must fix (more light, more storage, a worn-out kitchen) and the most you are willing to spend. A preview cannot tell you what is worth doing. A goal and a cap can, and you will use them in step 6.
2. Photograph the space as it is today
Take the photo in landscape, in daylight, from a corner, with the camera held level. Fit in as much of the room as you can, with the windows and doors visible. Clear loose items off the counters and floor. Take a few extra photos of the details you worry about, such as a damp patch or a low beam, and keep them for your builder.
3. Decide what stays and what changes
Walls, windows, plumbing and the floor plan are expensive to move. Surfaces are cheap to change: paint, tiles, cabinet fronts, lighting. Decide which kind of change you are planning. In the interior tool, the panel "Keep things the same / how much to change (optional)" lets you pick Default, Subtle update, Balanced or Full remodel, and tick the parts to keep.
4. Upload the photo and preview it in Remodel mode
Open the interior design tool, then under "Select Mode" pick Remodel (Redesign works if you only want new furniture and decor). Choose the Room Type and a Style, then upload your photo under "Upload Image". Press "Generate Interior Design". You can add a room size under "Room size (optional)", and list things to leave out under "Leave something out (optional)".
5. Try two or three options on the same photo
Run the same photo again with a different Style, or change the answer in "Keep things the same / how much to change (optional)". Two or three options are enough. More just makes the choice harder. The results collect in the "Versions" strip under the picture, so you can tap between them. "↻ Generate again (same photo and settings)" gives another take on one option.
6. Compare the options with your own photo
Under a new result, "Compare with my photo" opens your original next to the preview, as a Slider or Side by side. Use it to see what really changed. "Make a moodboard" puts your versions on one sheet that is easy to share with whoever lives with you or pays with you. The "Find items like this (Google Lens)" link helps you find products that resemble what you see.
7. Check each result for things that cannot be built
AI previews do not know your building. Look for windows or doors that moved, walls that vanished, a ceiling that got higher, or fittings in places that have no pipes. Mark anything that would need structural work, new plumbing or new wiring. Those are the items to price first. If the preview looks perfect but needs a wall removed, it is not a cheap option.
8. Put rough numbers in the cost list, then print a brief
Under the result, open "Cost list" and add a row for each change: Item, Supplier, Qty and Unit price, in your own currency. The tool adds the Total. It saves in your browser only, and it holds your numbers, not ours. Then use "Print / save as PDF", add a project name and short notes, and take the page to your builder as a starting brief.
Free to try. Upload one photo of your room and pick Remodel.
One room, three options side by side
Each result below is one run on the photo above with the settings listed. Nothing was retouched. Look at them as you would look at three quotes from three designers: the aim is to see the difference, not to pick the prettiest.
Option A
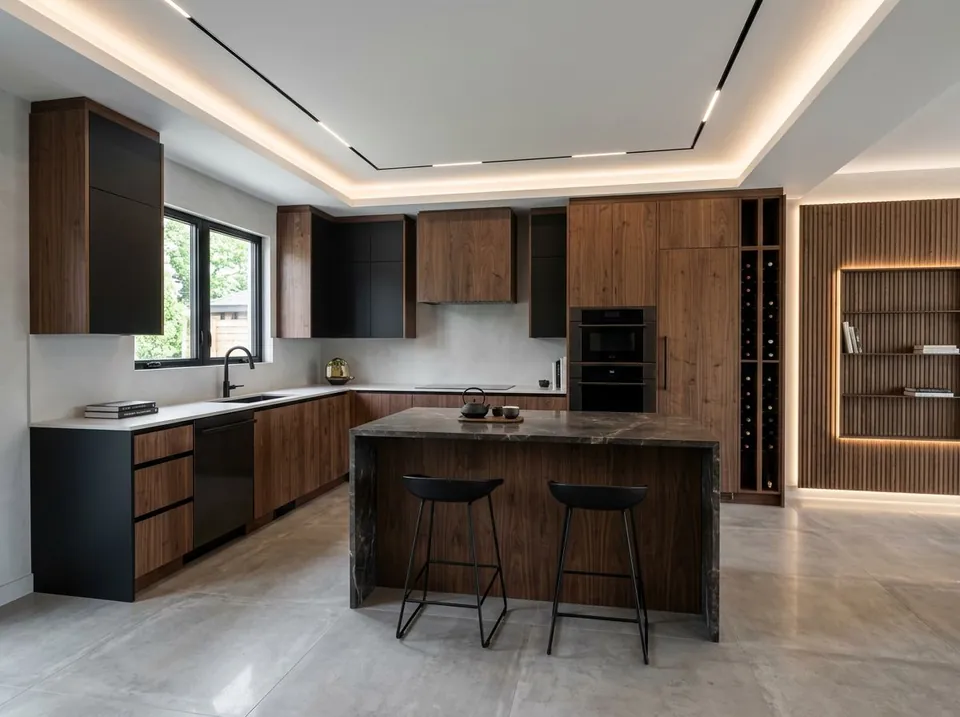
Settings: Mode: Remodel; Room Type: Kitchen; Style: Modern
Option B
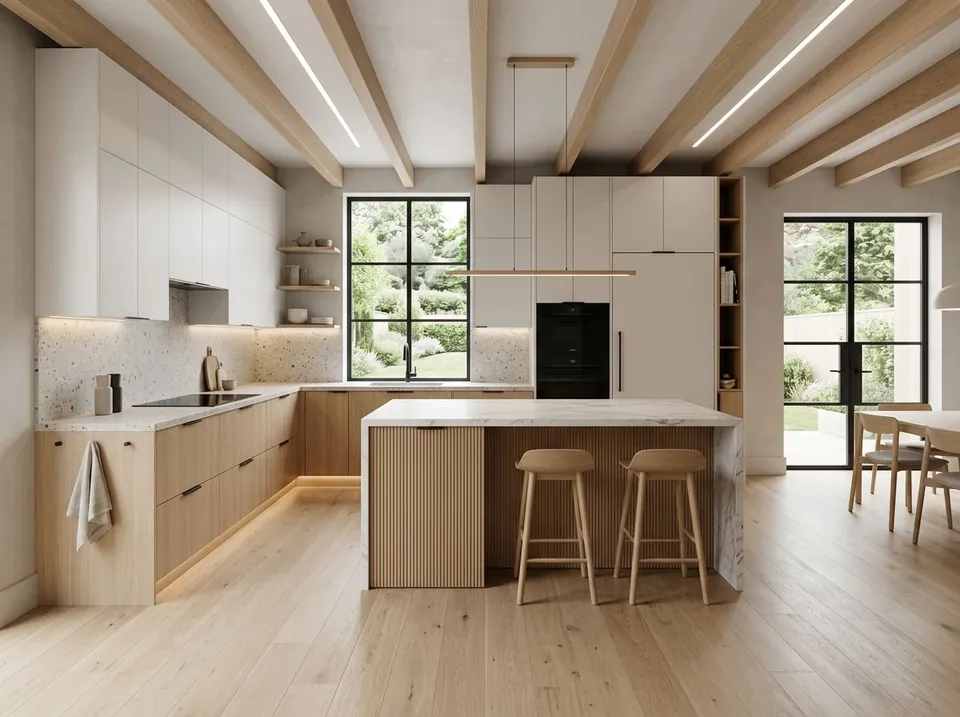
Settings: Mode: Remodel; Room Type: Kitchen; Style: Scandinavian
Option C
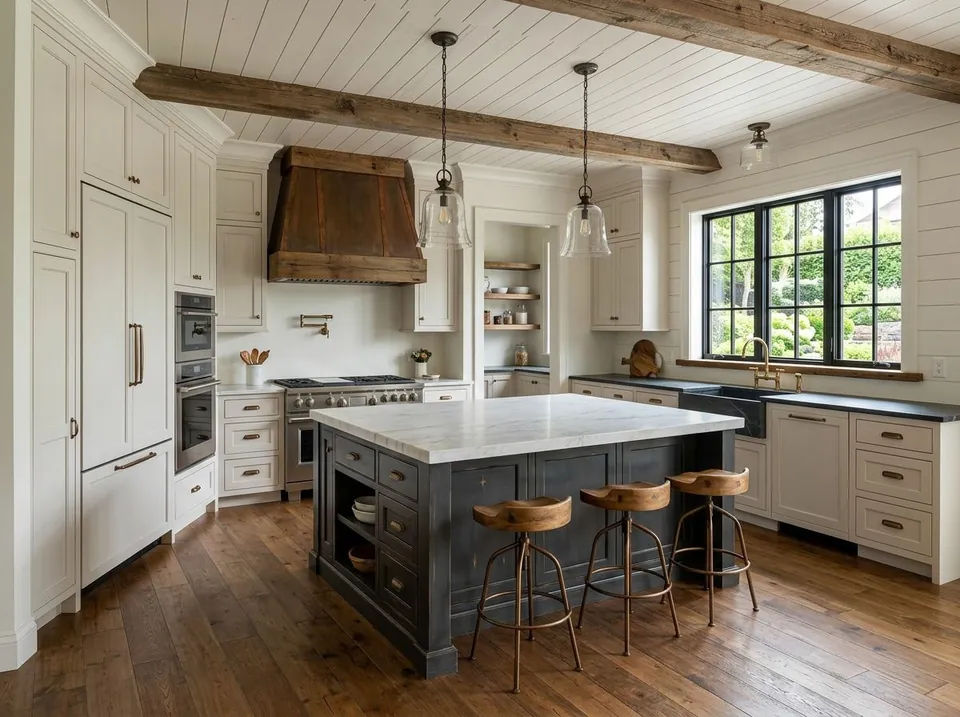
Settings: Mode: Remodel; Room Type: Kitchen; Style: Farmhouse
All three kept an island with stools in the middle, and all three changed the ceiling and the windows, even though we only picked a Style. In Remodel mode, treat ceiling, window, door and appliance changes as building work and price them before you fall for the picture. In our living room tests, Redesign mode stayed closer to the room than Remodel, but it still changed the window in all three runs, so check it too.
Outside and colour: two more ways to test before you spend
For the outside of the house, the exterior design tool takes a photo of the front and a Building Type and Style, with Materials, Time Setting and Weather under Advanced Options. If all you are weighing is a repaint, the paint visualizer is the quicker test: pick Interior Paint or Exterior Paint under "Select Paint Mode", type or pick a colour under "Enter Color", and generate.
Colour is the cheapest thing to change and the easiest to get wrong, because screens and light change how it looks. Treat the preview as a short list, then check a real sample on the wall in the morning and in the evening before you buy tins.
Walls repainted
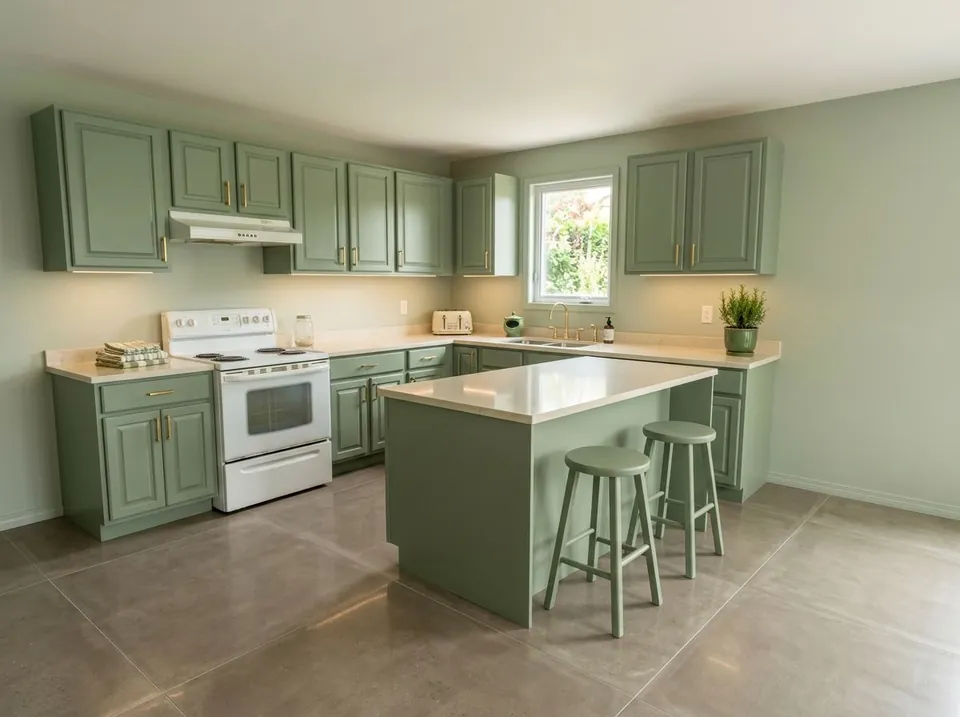
Settings: Select Paint Mode: Interior Paint; Room Type: Kitchen; Enter Color: sage green
What a preview can and cannot tell you
- It can show how a colour, material or style could feel in your own room, so you drop options early.
- It can show whether two choices clash, before you pay for both.
- It cannot show real sizes. Do not use it to check that a unit, a bed or a worktop fits. For that, measure the room. The "Standard sizes guide" and the "Room size (optional)" fields in the tool give typical figures only, and you must check your local building rules.
- It cannot give a price. Anything you see could cost very little or a lot, depending on your building, your area and your builder.
- It cannot see behind walls: pipes, wiring, damp, or what holds the roof up.
How to use your previews with a builder
Bring the printed page, your starting photos and your cost list. Say what the goal is and what the cap is. Ask the builder to say which changes in the picture are easy, which are hard and which cannot be done in your building.
Ask for a written quote from the builder based on measurements taken in your home. The preview is a way to explain what you have in mind, nothing more. It is not a drawing, a plan or an offer.
Frequently asked questions
How can I visualize a renovation before I start?
Take a bright photo of the space, upload it to an AI interior design tool, pick Remodel and a style, then compare two or three options with your original. Check each result for things that could not be built, and add rough costs before you decide.
Is an AI preview the same as a plan or a quote?
No. It is a concept picture. It has no measurements, does not show pipes, wiring or structure, and gives no price. Use it to decide what to ask for, then get a measured plan and a written quote from a professional.
What is the difference between Redesign and Remodel?
In our interior tool, Redesign restyles the room. Remodel is the mode to use when you want to see bigger changes, and it may suggest changes such as new wall arrangements or built-ins. Remodel results need a closer check against your original photo.
Can I add costs to my renovation preview?
Yes. Under a result, open "Cost list" to add items with a supplier, quantity and unit price in your own currency. It totals them for you and stays in your browser only.
How many options should I compare?
Two or three. Fewer and you are not really choosing, more and the differences blur. Compare each with your own photo and drop the ones that need structural work you cannot afford.
Can I show the previews to my builder?
Yes. Print the result or save it as a PDF with your project name and notes, and use it to explain what you want. Say clearly that it is a concept image, and ask for a quote based on measurements.
Test it before you pay for it
Take one bright photo of the space you plan to change and run it in Remodel mode with two styles. Keep the one that meets your goal inside your cap.
Preview my renovationRelated: Interior visualization · AI architectural rendering · Cost to build a house calculator · Choosing exterior paint colours · Virtually staging an empty room · AI prompts for architecture renders